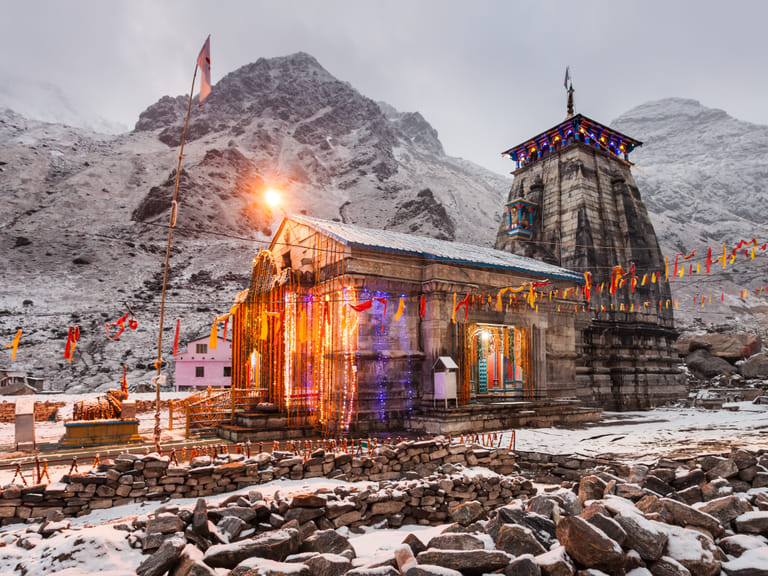
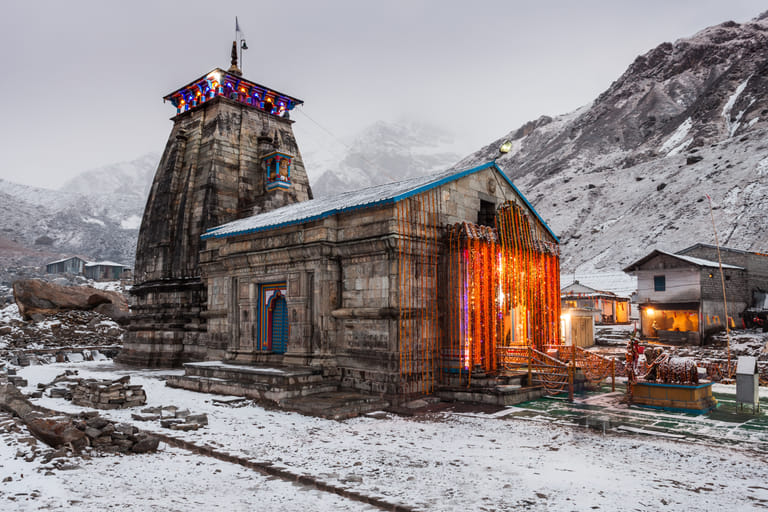
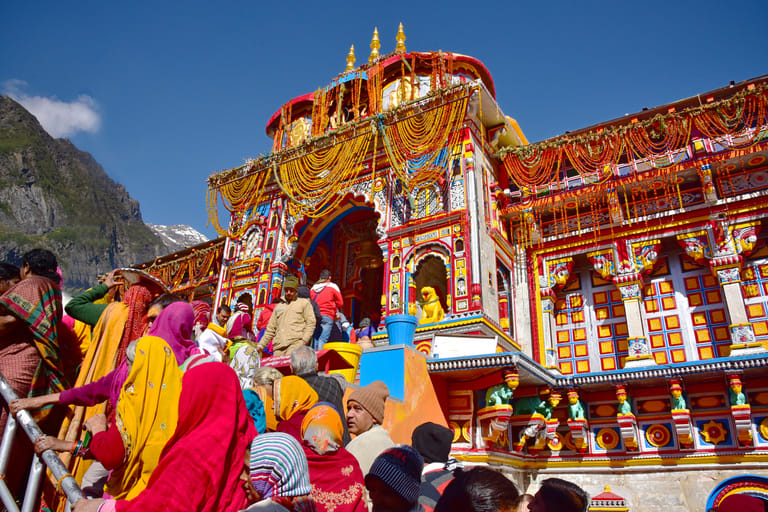
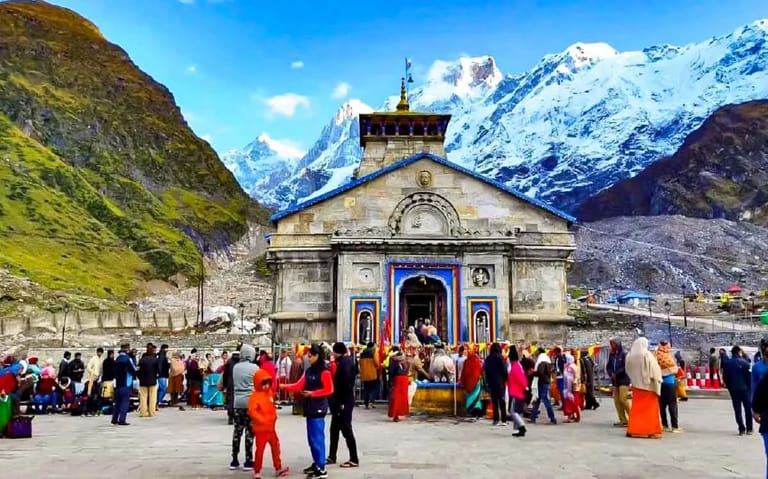
Planning your trip? Kedarnath tests you before you even reach the temple. The altitude, the cold, the crowd and yes, the paperwork. If you have not done your Kedarnath yatra registration yet, do that first. Everything else comes after.
A lot of pilgrims land in Rishikesh or Haridwar only to realise they skipped this step. The check posts are strict, and no amount of pleading works there.
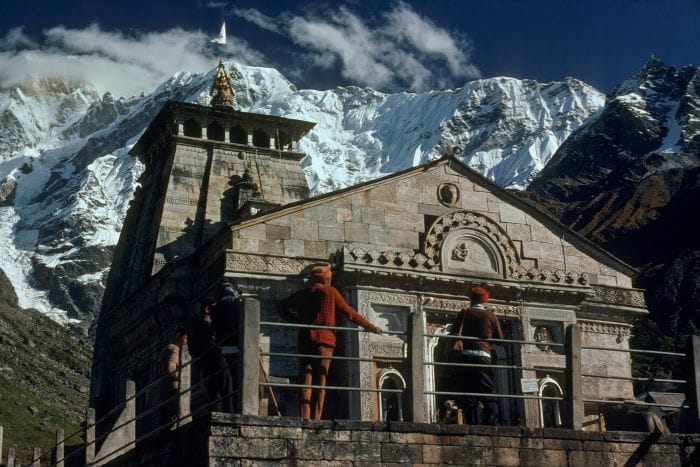
The Uttarakhand government made registration mandatory after the 2013 disaster. That year changed everything. Since then, the authorities have been careful about how many people go up each day.
In 2024, over 15 lakh people registered for the yatra. The 2025 season is expected to be even busier.
If you are planning the full Char Dham circuit, check out our India Tour Packages. It is much easier than coordinating everything yourself.
Here is what the registration process actually looks like.
Our Best Selling India Trip Packages
What is Kedarnath Yatra Registration?
In simple words, Kedarnath yatra registration is a government process where you submit your details before visiting the temple. Once done, you receive a QR-based pass that you must carry during the entire journey.
This system exists for two main reasons:
- Safety tracking in a high-altitude region
- Crowd control during peak season
After the 2013 disaster, authorities realised they needed a way to track pilgrims properly. That’s why Kedarnath yatra registration is now compulsory.
Kedarnath Opening Date 2026
Before you even register, you need to know the Kedarnath opening date 2026.
For 2026, the temple is opening on 22 April 2026 at 8:00 AM.
The yatra season usually continues till October or November, depending on the weather.
Registration started earlier on 6 March 2026, and slots fill quickly.
So if you’re planning this seriously, don’t delay your Kedarnath yatra registration.
Why is Kedarnath Yatra Registration Mandatory
Here’s the reality: this is not optional anymore.
Authorities use the Kedarnath yatra registration to:
- Monitor daily visitor limits
- Track pilgrims in emergencies
- Manage traffic and overcrowding
Without a valid pass, you won’t be allowed to go beyond entry points.
It’s that strict.
How to Do Kedarnath Yatra Registration Online
The easiest way is through Kedarnath online booking, and honestly, this is what most people should use.
Let’s get this straight, Kedarnath yatra registration is done through the official Uttarakhand government system, and the main portal is:
registrationandtouristcare.uk.gov.in
This is the only reliable place for Kedarnath online booking. Everything else is either an agent or a risk.
Step 1: Visit the Official Portal (Don’t Skip This Check)
Go to the official Uttarakhand Tourist Care website.
Registration for 2026 started on 6 March, and the portal handles lakhs of users during peak time.
If the site is slow, try early morning. Heavy traffic is common.
Step 2: Register Using Mobile Number (OTP Login)
You don’t need an email sign-up here.
- Enter your mobile number
- Receive OTP
- Verify and log in
This creates your account for the Kedarnath yatra registration.
Step 3: Fill Pilgrim Details (Be Careful Here)
Now you’ll enter:
- Full name (exactly as per ID)
- Age, gender
- ID type and number
This is where mistakes happen. If your name doesn’t match your ID, you can face issues during verification at checkpoints.
Step 4: Select Yatra Date and Dham
Next, choose:
- Kedarnath as your destination
- Travel date
Slots are limited per day to control crowd flow.
If your preferred date is full, you’ll need to adjust.
This is why early Kedarnath online booking matters more than anything else.
Step 5: Upload ID Proof (Important but Simple)
Upload a clear image of your ID.
Guidelines (based on official instructions):
- Format: JPG or PNG
- Size: usually between 10 KB and 150 KB
- Must be clearly readable
If the image is blurry, your Kedarnath yatra registration may not process properly.
Here’s something people get wrong: Registration is free
If any site asks for money just for Kedarnath yatra registration, it’s likely fake.
Review your details and submit the form.
Step 7: Download Your QR-Based Yatra Pass
Once submitted, you’ll get:
- Registration number
- QR code pass (Yatra e-pass)
Download it immediately.
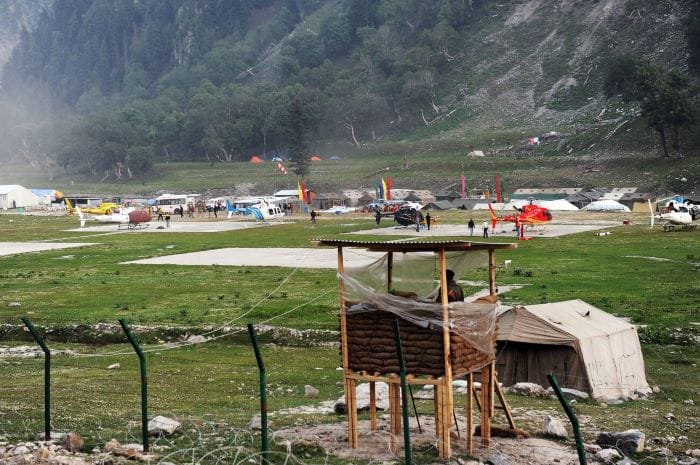
This QR code is mandatory and will be checked at places like Sonprayag and Gaurikund.
No QR code = no entry.
Alternative Online Methods (Most People Don’t Know This)
Apart from the website, there are 3 other official digital methods:
1. WhatsApp Registration
- Send “YATRA” to 8394833833
- Follow the chatbot steps
- Get the pass directly on WhatsApp
2. Mobile App
- Download “Tourist Care Uttarakhand”
- Register and get a pass
3. Helpline Support
- Call the official number and register
These exist mainly for people who struggle with standard Kedarnath online booking.
Documents Required for Kedarnath Yatra Registration
The good news? The list is short. The bad news? If you mess up even one detail, you can get stopped at checkpoints.
1. Government ID Proof (Mandatory)
You need any one of the following:
- Aadhaar Card
- Voter ID
- PAN Card
- Passport
- Driving Licence
The key rule: Your name on the form must exactly match your ID. Even small differences can cause issues.
- Required for OTP verification
- Used to log in and download your pass
- Should stay active during the trip
No mobile number = no Kedarnath yatra registration.
3. Email ID (For Online Registration)
- Used to receive confirmation and registration slip
- Not always mandatory for offline, but needed for Kedarnath online booking.
4. Digital Copy of ID (For Online Upload)
If you’re doing Kedarnath online booking, you must upload your ID:
- Format: JPG or PNG
- Size: 10 KB to 150 KB
- One file per person
If the file is too large or unclear, the upload may fail without warning.
5. Individual Registration for Each Person
This is where many people get it wrong:
- Every pilgrim needs a separate registration
- No family or group registration shortcut
Even children (above a certain age) need their own entry.
6. Vehicle Green Card (Only If Driving)
If you’re taking your own car:
- You need a separate vehicle permit (Green Card)
- This is NOT part of the Kedarnath yatra registration
- Must be applied separately
Without it, your vehicle can be stopped at entry points.
7. Medical Fitness (Not Mandatory, But Important)
There’s no strict certificate required during registration, but:
- Health checks are done at certain points
- Strongly advised for people above 60 or with health issues
High altitude is no joke. Authorities can stop you if you’re not fit.
Kedarnath Ticket Booking Explained
Let’s clear a common confusion.
There is no entry fee for the temple. But when people say Kedarnath ticket booking, they usually mean travel arrangements.
This includes:
- Trek access
- Helicopter rides
- Pony or palki booking
So, Kedarnath ticket booking is not a single ticket. It depends on how you choose to travel.
Kedarnath Trek Distance and Route
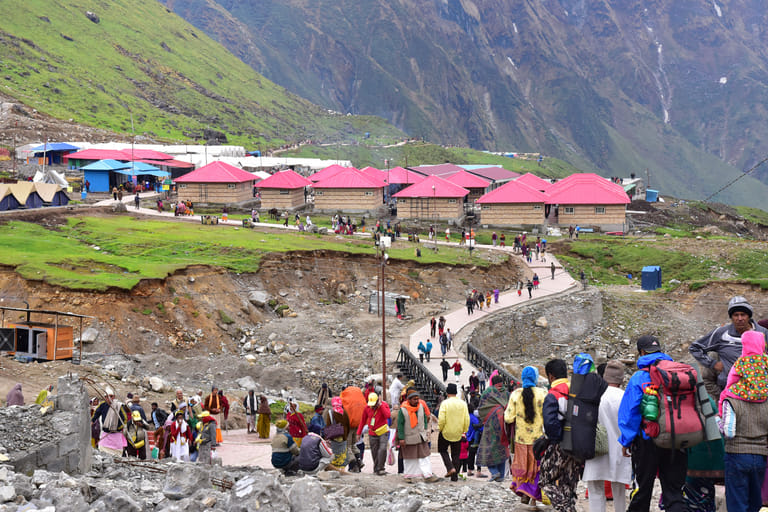
The Kedarnath trek distance is about 16 km one way, starting from Gaurikund to the Kedarnath temple. It’s a steady uphill walk and takes 6–8 hours for most people.
Route Overview:
- Gaurikund to Jungle Chatti (4 km): Easy start, gradual climb
- Jungle Chatti to Bheembali (3–4 km): Moderate, slight steep sections
- Bheembali to Linchauli (4 km): Tougher stretch, higher altitude
- Linchauli to Base Camp (3–4 km): Cold and tiring
- Base Camp to Temple (1 km): Final stretch
The path is well-maintained with food stalls, rest points, and medical help along the way.
Key Points:
- Start early (around 4–6 AM)
- Walk at a steady pace
- Ponies, palkis, and helicopter options are available if you don’t want to cover the full Kedarnath trek distance
How to Reach Kedarnath Temple (Accurate & Verified)
How to reach Kedarnath is a mix of road travel, trek or helicopter. There’s no direct road to the temple.
Step 1: Reach Haridwar / Rishikesh / Dehradun
- Nearest airport: Dehradun (Jolly Grant)
- Nearest railway stations: Haridwar or Rishikesh
From here, your road journey starts.
Step 2: Travel by Road to Sonprayag
- Distance: around 200–220 km from Rishikesh
- Time: 7–9 hours
Buses, taxis, and private vehicles are available. You cannot go beyond Sonprayag in your own car.
Step 3: Sonprayag to Gaurikund
- Distance: 5 km
- Mode: Shared taxi only
Gaurikund is the last motorable point.
Step 4: Gaurikund to Kedarnath Temple
From here, you have 3 options:
1. Trek (most common)
- Distance: about 16 km
- Time: 5–8 hours
- Route: Gaurikund - Jungle Chatti - Bheembali - Linchauli - Kedarnath
2. Pony / Palki
- Available at Gaurikund
- Paid option for easier travel
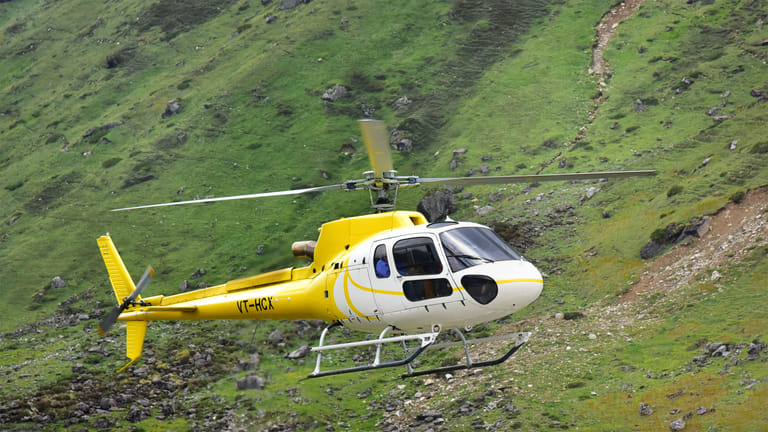
Kedarnath Helicopter Ticket Booking
If you don’t want to trek, Kedarnath helicopter ticket booking is a popular option.
Kedarnath helicopter ticket booking is the fastest way to reach the temple without trekking. Tickets are limited and sell out quickly.
Book only through the official IRCTC HeliYatra portal. Avoid agents and fake websites.
- Phata, Sirsi, Guptkashi - Kedarnath
- Flight time: 7–15 minutes
- Sirsi: ₹6,000–₹7,000
- Phata: ₹9,000–₹10,000
- Guptkashi: ₹12,000+
- Complete Kedarnath yatra registration
- Login on HeliYatra portal
- Select date and route
- Enter details and pay
- Download ticket
Dehradun to Kedarnath Helicopter Ticket Price
For those who want a premium option, flights from Dehradun are available.
The Dehradun to Kedarnath helicopter ticket price is significantly higher than shorter routes.
While short routes cost around ₹6,000–₹12,000 depending on location, longer routes like Dehradun packages can go much higher.
So before choosing this, think about your budget.
Suggested Read: Best time to visit Kedarnath
Best Time to Complete Registration
The best time for Kedarnath yatra registration is as early as possible after it opens, usually in March.
What Works Best:
- March–April: Ideal time for registration
- 2–4 weeks before travel: Safe window if you missed early slots
Why Early Matters:
- Limited daily slots
- Better choice of travel dates
- Easier Kedarnath online booking and stay options
What to Avoid:
- Last-minute registration in May–June (peak rush)
- Monsoon period (July–August) due to weather risks
Simple rule: Register early, plan later. If you delay Kedarnath yatra registration, everything else becomes harder, from travel to Kedarnath ticket booking.
People mess this up more often than you’d think. Here’s what you should avoid:
- Ignoring the Kedarnath yatra registration till the last moment
- Booking from unofficial websites
- Not checking weather updates
- Overpacking for the trek
- Assuming fitness is not important
Even small mistakes can ruin your trip.
Suggested Read: Delhi to Kedarnath Travel Guide
What Happens After Registration
Once your Kedarnath yatra registration is done, you’ll receive a QR code or slip. This will be checked at different points during your journey.
Keep it handy at all times. No slip, no entry. It’s that simple.
Travel Tips That Actually Help
Here’s what people don’t always tell you:
- Start your trek early in the morning
- Carry light snacks and water
- Wear comfortable shoes
- Take breaks when needed
- Don’t rush the journey
Kedarnath is not just a destination. It’s an experience.
Final Thoughts: Plan Smart, Travel Easy
Kedarnath is one of those journeys where planning really matters. The good news is, once your Kedarnath yatra registration is sorted, everything else becomes easier.
Use Kedarnath online booking to save time. Understand your options for booking tickets to Kedarnath. Decide whether you want to trek or book a Kedarnath helicopter ticket. Check the Kedarnath opening date 2026 before locking your dates.
What this really means is simple: don’t treat this like a last-minute trip. Plan it properly, stay informed, and you’ll have a smooth and meaningful journey.